

Freshbooks is a popular accounting tool. It helps small businesses manage finances.
But, how do you use Freshbooks for accounting? In this blog post, we’ll guide you through the basics of using Freshbooks. You’ll learn how to set up your account, track expenses, and create invoices. Freshbooks is designed to be user-friendly.
Even if you’re not an accountant, you can handle your business finances with ease. This software saves time and reduces stress. It’s perfect for freelancers and small business owners. By the end of this post, you’ll feel confident using Freshbooks for all your accounting needs. Let’s get started!
Click Here To Get Promo Code & Full FreshBooks Review With Extra Bonuses
Introduction To Freshbooks
FreshBooks is a popular accounting software designed for small business owners and freelancers. It simplifies managing invoices, expenses, and time tracking. This guide will help you understand how to use FreshBooks for your accounting needs.
What Is Freshbooks?
FreshBooks is a cloud-based accounting tool. It helps users manage their finances. It offers features like invoicing, expense tracking, and reporting. Users can access it from any device with internet access. The software is user-friendly and designed for those without an accounting background.
Benefits Of Using Freshbooks
FreshBooks offers several benefits. Firstly, it saves time. Automating tasks like invoicing and expense tracking means less manual work. Secondly, it improves accuracy. The software reduces errors and ensures all data is up-to-date. Thirdly, it offers financial insights. Detailed reports help users make informed decisions.
FreshBooks also offers excellent customer support. Users can get help through various channels. This ensures any issues are resolved quickly. Finally, the software is scalable. It grows with your business. Whether you are a freelancer or a small business owner, FreshBooks can meet your needs.
Setting Up Your Freshbooks Account
Freshbooks makes accounting easier for small businesses. Setting up your account is the first step. It is simple and quick. Follow these steps to start using Freshbooks for your accounting needs.
Creating An Account
To create an account, visit the Freshbooks website. Click the “Get Started” button. Fill in your email, password, and business name. After entering your details, click the “Create Account” button. You will receive a confirmation email. Open the email and click the confirmation link. Your Freshbooks account is now ready.
Choosing The Right Plan
Freshbooks offers different plans. Choose the one that fits your business size. The Lite plan is good for freelancers. The Plus plan suits small businesses with a few clients. The Premium plan is best for growing businesses. Take your time to read about each plan. Select the one that meets your needs. You can always upgrade later as your business grows.
Navigating The Dashboard
Are you new to FreshBooks and feeling overwhelmed? Don’t worry. Navigating the dashboard is simpler than you think. The dashboard is your command center. Here, you can access all the tools and features you need. Let’s break it down step by step.
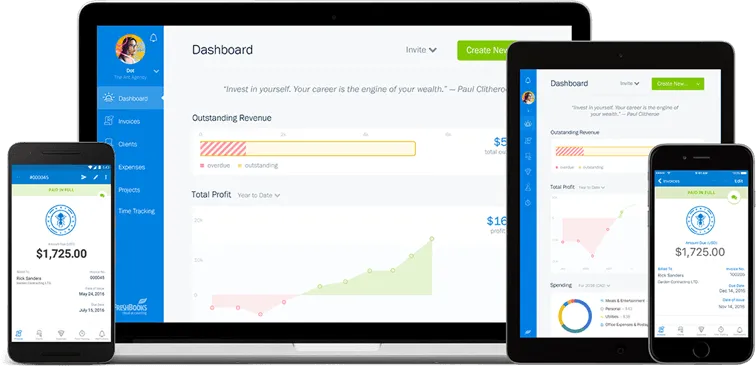
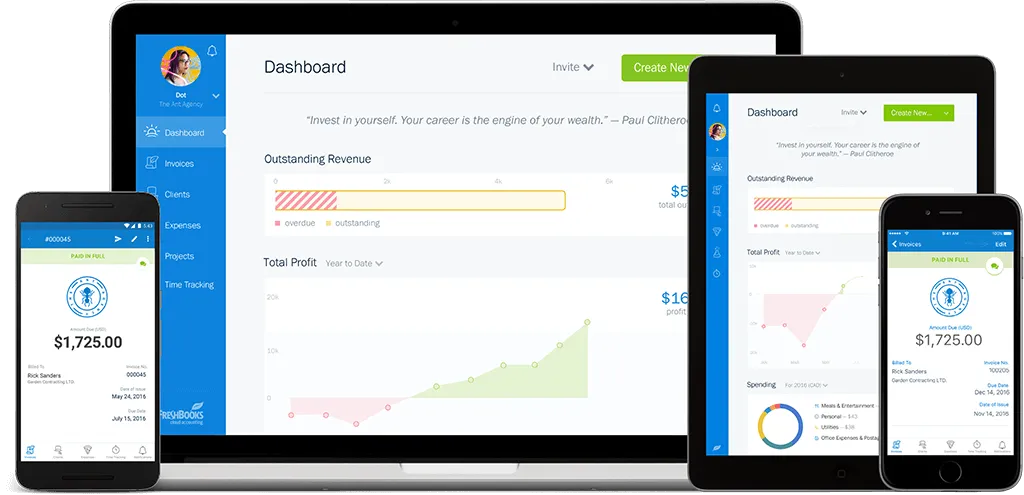
Dashboard Overview
The dashboard gives you a quick glance at your financial health. It displays your recent activity, outstanding invoices, and expenses. You can also see your profit and loss reports. This helps you stay on top of your finances. The layout is user-friendly. Everything is just a click away.
Customizing Your Dashboard
Customizing your dashboard is easy. You can rearrange the widgets to suit your needs. Click and drag the widgets to your preferred position. You can add or remove widgets based on your preferences. This makes your dashboard more useful. Tailor it to fit your workflow.
Managing Clients
Managing clients in FreshBooks is essential for smooth accounting. It helps you keep track of client information. You can easily add new clients and organize their details. This ensures you have all the necessary information at your fingertips.
Adding New Clients
To add new clients in FreshBooks, go to the ‘Clients’ tab. Click on ‘New Client’. Enter the client’s name, email, and other details. Save the information. The client will now appear in your list.
Organizing Client Information
Organizing client information is simple in FreshBooks. Go to the ‘Clients’ tab. Click on a client’s name. Update their contact details and add notes. You can also categorize clients. Use tags to keep track of their status.
This way, you can quickly find the information you need. Stay organized and efficient with FreshBooks’ client management features.
Invoicing With Freshbooks
Managing invoices can be a daunting task for many small business owners. FreshBooks makes this easier with its user-friendly invoicing features. Let’s explore how to use FreshBooks for invoicing, from creating invoices to tracking their status.
Creating Invoices
FreshBooks simplifies the invoice creation process. Start by navigating to the Invoices section from the dashboard. Click on the “Create New Invoice” button. A form will appear where you can add details like:
- Client’s name
- Invoice date
- Payment terms
- Item descriptions
- Rates and quantities
Once you fill in these details, click on the “Save” button. Your invoice is now ready to be sent.
Customizing Invoice Templates
Personalizing invoices helps in maintaining brand consistency. FreshBooks offers several customization options. Go to the Settings and select Custom Invoice Templates. Here, you can:
- Choose a template style
- Add your business logo
- Select preferred colors
- Include custom fields
Save the changes to apply them to your future invoices. This makes your invoices look professional and aligned with your brand.
Tracking Invoice Status
FreshBooks allows you to keep track of your invoices easily. Under the Invoices section, you can see a list of all your invoices. The status of each invoice is displayed next to it:
| Status | Description |
|---|---|
| Draft | Invoice created but not sent |
| Sent | Invoice sent to client |
| Viewed | Client has opened the invoice |
| Paid | Invoice fully paid |
This feature helps you stay on top of your invoicing process. You can follow up with clients who have not yet viewed or paid their invoices.
Expense Tracking
Expense Tracking is a crucial aspect of accounting for any business. Keeping accurate records of your expenses helps you manage your budget and ensures compliance with tax laws. FreshBooks makes expense tracking simple and efficient. Let’s explore how to use FreshBooks for recording, categorizing, and uploading receipts for your expenses.
Recording Expenses
To record expenses in FreshBooks, start by logging into your account. Navigate to the “Expenses” section from the main dashboard. Click on the “New Expense” button. Fill in the required fields:
- Date
- Vendor
- Amount
- Category
- Description (optional but recommended)
Once all details are entered, click “Save.” Your expense is now recorded.
Categorizing Expenses
Categorizing expenses is essential for accurate financial reporting. FreshBooks offers predefined categories, but you can also create custom categories. To categorize an expense, select the expense from your list and choose an appropriate category from the dropdown menu. Some common categories include:
- Office Supplies
- Travel
- Meals and Entertainment
- Utilities
Proper categorization helps in generating detailed reports.
Uploading Receipts
Keeping receipts is vital for audits and tax filings. FreshBooks allows you to upload receipts directly to your expenses. To upload a receipt, follow these steps:
- Open the expense entry.
- Click on the “Attach Receipt” button.
- Choose the file from your device.
- Click “Upload.”
The receipt is now attached to the expense. You can view or download it anytime.
Using FreshBooks for expense tracking ensures that your financial records are accurate and up-to-date. This simplifies budgeting and auditing processes, making your accounting tasks easier.
Time Tracking
Time tracking is crucial for freelancers and businesses. It helps ensure accurate billing and efficient workflow. FreshBooks offers a user-friendly time tracking feature. This tool makes tracking billable hours and generating time reports simple and effective.
Tracking Billable Hours
Tracking billable hours is essential for accurate client billing. FreshBooks allows you to log hours easily. Start the timer when you begin work. Stop it when you finish. It’s as simple as that. You can also enter time manually. This flexibility ensures that all hours are tracked. You can categorize hours by project or client. This helps keep your work organized.
Generating Time Reports
Generating time reports in FreshBooks is straightforward. These reports help you review how time is spent. Go to the “Reports” section. Select the “Time Entry Details” report. Customize the date range and projects. Click “Generate Report.” Your detailed time report is ready. You can see hours worked for each task. This insight helps in making informed decisions.

Credit: www.youtube.com
Generating Financial Reports
Generating Financial Reports is an essential part of managing your business’s finances. FreshBooks makes this task straightforward and efficient. With FreshBooks, you can quickly create detailed reports that help you understand your financial health. This section explains how to generate key financial reports in FreshBooks.
Creating Profit And Loss Statements
Profit and Loss Statements, also known as Income Statements, show your business’s revenue and expenses over a specific period. Here’s how to create one in FreshBooks:
- Log in to your FreshBooks account.
- Go to the “Reports” section from the main dashboard.
- Select the “Profit and Loss” report.
- Choose the desired date range using the calendar tool.
- Click on the “Generate Report” button.
The report will display your total income, expenses, and net profit. You can download or print this report for your records.
Generating Balance Sheets
Balance Sheets provide a snapshot of your business’s financial position at a specific point in time. To generate a balance sheet in FreshBooks, follow these steps:
- Log in to your FreshBooks account.
- Navigate to the “Reports” section.
- Select the “Balance Sheet” report.
- Set the date for the balance sheet using the calendar tool.
- Click “Generate Report”.
The balance sheet will show your assets, liabilities, and equity. This report helps you understand what you own and owe. You can also download or print this report.
Integrations And Add-ons
FreshBooks makes accounting easy with its many integrations and add-ons. These features help you connect different tools and services. Use them to streamline your accounting tasks. They save time and reduce errors. Let’s explore how to use these integrations.
Connecting Bank Accounts
Connect your bank account to FreshBooks. This allows you to import transactions automatically. No more manual entry. This saves time and ensures accuracy. Follow these steps:
- Go to the “Banking” section in FreshBooks.
- Click “Add Account.”
- Select your bank from the list.
- Enter your bank login details securely.
- Authorize FreshBooks to access your transactions.
FreshBooks will now import your transactions. They will appear in your account. Review and categorize them easily. This keeps your records up-to-date. It also helps with accurate reporting.
Using Third-party Apps
FreshBooks integrates with many third-party apps. These apps enhance its functionality. They include tools for project management, CRM, and more. Here are some popular integrations:
| App | Function |
|---|---|
| Trello | Project management |
| Zapier | Automation |
| Stripe | Payment processing |
| Mailchimp | Email marketing |
To connect an app, follow these steps:
- Navigate to the “Apps” section in FreshBooks.
- Search for the app you want to connect.
- Click “Connect” next to the app.
- Follow the on-screen instructions.
These integrations help you manage your business better. They ensure all your tools work together. This makes your accounting process smoother.
Credit: www.freshbooks.com
Tips And Best Practices
Using FreshBooks for accounting can streamline your business operations. To maximize its potential, follow these tips and best practices. They will help you stay organized and efficient.
Regularly Updating Records
Keep your financial records current. Update transactions daily or weekly. This habit ensures accuracy and saves time. FreshBooks makes it easy to log expenses and track income. Consistent updates will help you avoid costly mistakes. Regular updates also provide a clear financial picture.
Utilizing Customer Support
FreshBooks offers excellent customer support. Use it whenever you have questions. Their team can help with any issues you encounter. They offer tutorials, articles, and live chat. Don’t hesitate to reach out for assistance. This support can make your accounting tasks easier.
Credit: www.freshbooks.com
Frequently Asked Questions
What Is Freshbooks Used For?
FreshBooks is used for managing accounting tasks. It helps with invoicing, tracking expenses, and managing clients. It is designed for small business owners.
How Do I Get Started With Freshbooks?
To get started with FreshBooks, sign up on their website. Follow the setup wizard to enter your business details. You can then start invoicing and tracking expenses.
Can Freshbooks Handle Multiple Currencies?
Yes, FreshBooks supports multiple currencies. You can invoice clients in their preferred currency. This feature is great for international businesses.
Is Freshbooks Suitable For Freelancers?
Yes, FreshBooks is ideal for freelancers. It simplifies invoicing, expense tracking, and time management. Its user-friendly interface is perfect for individual use.
Conclusion
Using FreshBooks for accounting can simplify your financial tasks. This software offers easy invoicing, expense tracking, and report generation. With its intuitive design, anyone can manage their finances efficiently. FreshBooks saves time and reduces stress. Small business owners will find it particularly useful.
Start using FreshBooks today to streamline your accounting process. It’s a practical tool for keeping your finances in order. Stay organized and focus on growing your business.