
Starting a Shopify store can seem daunting at first. Many beginners feel overwhelmed by the steps involved.
But don’t worry, it’s simpler than you think. Shopify is a popular platform for creating online stores. It offers tools to help you sell products and manage your business. This guide will walk you through the basics. You’ll learn how to set up your store, choose a theme, and add products.
By the end, you’ll have a functional Shopify store ready to welcome customers. Whether you’re selling handmade crafts or digital downloads, this introduction will help you get started with ease. Let’s dive in and make your e-commerce dream a reality!
Credit: www.youtube.com
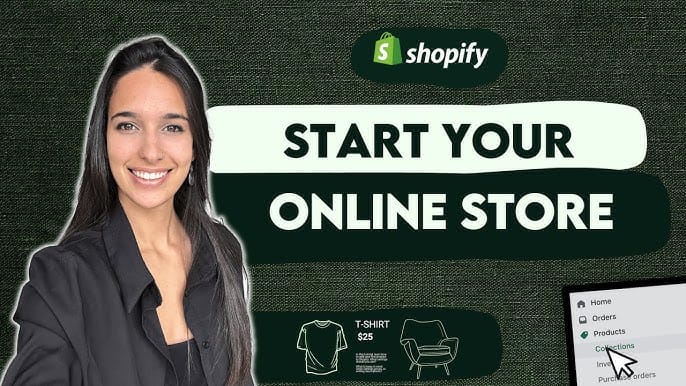
Introduction To Shopify
Starting an online store can feel overwhelming. Shopify makes it simple. This platform helps even beginners create and manage their own online shop. Let’s dive into the basics. This section introduces you to Shopify.
What Is Shopify?
Shopify is an e-commerce platform. It allows you to set up an online store. You can sell products and services. Shopify provides all the tools you need. From creating your website to managing sales, it covers everything. You do not need to know coding. It’s designed for ease of use.
Benefits Of Using Shopify
There are many benefits to using Shopify. First, it is user-friendly. Even beginners can navigate it easily. Second, it offers customizable templates. You can make your store look unique. Third, it supports multiple payment options. This makes buying easy for your customers. Fourth, Shopify has excellent customer support. If you face issues, help is just a call away. Lastly, it integrates with other tools. From marketing to shipping, it covers all aspects of running a store. All these features make it a great choice for beginners.
Setting Up Your Shopify Account
Starting a Shopify store can be exciting. The first step is setting up your Shopify account. This process is simple and fast. You will be ready to sell in no time. Here’s a guide to help you get started.
Creating An Account
To start, visit the Shopify website. Click on the “Get Started” button. You will be asked to enter your email address, create a password, and choose a store name. Make sure your store name is unique and reflects your brand. Once you’ve filled out the details, click “Create Your Store”.
Next, Shopify will ask for some additional information. Fill in details such as your name, address, and phone number. This information is crucial for setting up your store and receiving payments.
| Field | Details |
|---|---|
| Email Address | Your business email |
| Password | A strong password for security |
| Store Name | A unique name for your store |
| Address | Your business address |
| Phone Number | Your contact number |
Choosing A Plan
Shopify offers different plans to suit various needs. As a beginner, start with the Basic Shopify Plan. It offers all the essential features you need. You can always upgrade later as your business grows.
- Basic Shopify: Ideal for new stores
- Shopify: Suitable for growing businesses
- Advanced Shopify: Best for large-scale operations
Each plan comes with a 14-day free trial. Use this trial period to explore the features. Make sure to choose a plan that fits your budget and business goals.
After selecting your plan, enter your payment details. Shopify accepts various payment methods. Once done, you are ready to start customizing your store.
Setting up your Shopify account is the first step. With this guide, you can create an account and choose the right plan. Next, we will explore how to customize your store. Stay tuned for more tips and tricks.
Customizing Your Store
Starting a Shopify store is an exciting journey. Customizing Your Store is a crucial step in creating a unique and engaging online presence. This process helps you stand out from competitors and appeal to your target audience. Let’s dive into the essentials of customizing your Shopify store.
Selecting A Theme
The first step in customizing your Shopify store is selecting a theme. Shopify offers a variety of free and paid themes that cater to different industries and styles. When choosing a theme, consider the following factors:
- Visual appeal: Ensure the theme matches your brand’s aesthetic.
- Functionality: Check if the theme supports the features you need.
- Responsiveness: Make sure the theme looks good on all devices.
Once you find a theme that fits your needs, you can install it with a single click. This sets the foundation for further customization.
Personalizing Your Theme
After selecting a theme, it’s time to personalize your theme. This step involves tailoring the theme to reflect your brand’s identity. Here are some key areas to focus on:
- Logo and Favicon: Upload your logo and favicon to reinforce brand recognition.
- Colors and Fonts: Choose colors and fonts that align with your brand’s style.
- Homepage Layout: Arrange sections like banners, featured products, and testimonials to create an engaging homepage.
Use the Shopify theme editor to make these changes. The editor allows you to preview your changes in real-time. This helps you see how your store will look to visitors.
To further enhance your store, consider adding custom sections. This can include:
- Image sliders: Showcase multiple images in a single space.
- Product carousels: Highlight featured products dynamically.
- Testimonials: Display customer reviews to build trust.
Remember to save your changes frequently. This ensures you don’t lose any progress while working on your store.
Customizing your Shopify store is a continuous process. Regularly update your store’s look and feel to keep it fresh and engaging. Happy customizing!
Adding Products
Adding products to your Shopify store is a crucial step. This section will guide you through the process of creating effective product listings and writing compelling product descriptions.
Product Listings
First, navigate to the Products section in your Shopify dashboard. Click on Add product to start.
- Enter a product title.
- Upload high-quality images.
- Set the price.
- Manage inventory.
Ensure you categorize your products correctly. This helps customers find what they need easily.
Product Descriptions
Write clear and concise product descriptions. Keep them short yet informative.
- Highlight key features.
- Use bullet points for easy reading.
- Include dimensions, materials, and care instructions.
Here’s an example:
Product Title: Cozy Winter Sweater
Description:
- 100% wool
- Available in sizes S, M, L
- Machine washable
Use simple language and avoid jargon. Your descriptions should be easy to understand for all customers.
Setting Up Payments
Setting up payments is a crucial step in launching your Shopify store. This ensures you can securely accept money from customers. Here’s a detailed guide on setting up payments.
Payment Gateways
A payment gateway connects your online store to a payment processor. Shopify offers multiple payment gateways to choose from. The most popular option is Shopify Payments. Using Shopify Payments simplifies the setup process. It also integrates directly with your store.
Other popular payment gateways include:
- PayPal
- Stripe
- Authorize.net
Consider the following when choosing a payment gateway:
- Transaction fees
- Supported currencies
- Payment methods accepted
Make sure your chosen gateway supports your target market. Some gateways may not work in all countries.
Transaction Fees
Transaction fees are charges applied to each sale. These fees can vary based on your payment gateway. Shopify Payments has lower transaction fees for higher-tier plans. Here is a simple breakdown:
| Shopify Plan | Transaction Fee |
|---|---|
| Basic Shopify | 2.9% + 30¢ per transaction |
| Shopify | 2.6% + 30¢ per transaction |
| Advanced Shopify | 2.4% + 30¢ per transaction |
Using external payment gateways may incur additional fees. Shopify charges 2% for Basic Shopify, 1% for Shopify, and 0.5% for Advanced Shopify for external gateways.
To minimize costs, consider using Shopify Payments if available in your country.
Configuring Shipping Options
Starting a Shopify store is an exciting journey. One critical step is configuring shipping options. This ensures your customers receive their orders on time and at reasonable rates. Let’s break down the shipping settings into manageable parts.
Shipping Rates
Setting up shipping rates is crucial for your store’s success. You can create various shipping rates based on order weight, price, or specific items.
- Weight-based rates: Ideal for products with varying weights.
- Price-based rates: Suitable for stores with diverse price ranges.
- Flat rates: Simple and easy for customers to understand.
Offering free shipping can boost sales. Consider setting a minimum purchase amount to qualify.
Shipping Zones
Next, define your shipping zones. These are regions where you will ship your products. Shipping zones help manage shipping rates and times effectively.
To set up shipping zones, follow these steps:
- Navigate to the ‘Settings’ section in your Shopify admin.
- Select ‘Shipping and delivery’.
- Click ‘Manage rates’ next to the shipping profile you want to edit.
- Add or edit shipping zones as needed.
Common shipping zones include:
| Zone | Details |
|---|---|
| Domestic | Shipping within your own country. |
| International | Shipping to other countries. |
| Local | Shipping within your city or region. |
Each zone can have different shipping rates and methods. This flexibility allows you to cater to local and international customers efficiently.
Launching Your Store
Starting a Shopify store can seem overwhelming. But the most exciting part is launching your store. It’s the moment you go live and start selling your products. Before you do this, you need to make sure everything is perfect.
Reviewing Settings
Before you launch, review your store settings. Go to the Shopify admin panel. Check the settings under General, Taxes, Shipping, and Payments. Ensure your store name and contact details are correct.
- Verify your currency and time zone.
- Set up your tax rates for the regions you will sell in.
- Configure your shipping rates for different zones.
- Choose your preferred payment gateway.
Make sure your store policies are clear. These include refund policy, privacy policy, and terms of service. You can find these in the Legal section under settings.
Publishing Your Store
Once your settings are in order, it’s time to publish your store. You need to remove the password protection. Go to Online Store and then Preferences. Scroll down to the Password Protection section.
- Uncheck the Enable password option.
- Save your changes.
Now, your store is live and accessible to everyone. Make sure to check your storefront to see how it looks to visitors. Ensure all links work and all products are visible.
Finally, let your audience know your store is open. Use social media, email marketing, and word of mouth. Happy selling!

Credit: thriveagency.com
Marketing Your Store
Marketing your Shopify store is crucial for attracting and retaining customers. With the right strategies, you can increase visibility and drive sales. Let’s explore some essential marketing techniques to get started.
Seo Basics
Search Engine Optimization (SEO) helps your store rank higher on search engines. First, use relevant keywords in your product titles and descriptions. This makes it easier for customers to find your products. Write unique and detailed product descriptions. It adds value and improves your store’s search ranking.
Another important aspect is optimizing images. Use descriptive file names and add alt text. This helps search engines understand your images. Also, improve your site’s loading speed. A faster site enhances user experience and boosts SEO.
Social Media Marketing
Social media is a powerful tool for reaching potential customers. Create profiles on platforms like Facebook, Instagram, and Twitter. Share engaging content regularly. This could be product photos, behind-the-scenes looks, or customer testimonials.
Run promotions and contests to increase engagement. Encourage users to share your content. This can help expand your reach. Use social media ads to target specific audiences. This allows you to reach people who are likely to be interested in your products.
Respond to comments and messages promptly. This shows you value your customers and helps build a loyal community. Consistency is key. Post regularly and maintain a cohesive brand voice.
Managing Your Store
Managing your Shopify store effectively is crucial for success. It involves handling order fulfillment and providing excellent customer support. These tasks ensure a smooth shopping experience for your customers. Let’s dive into each aspect to help you manage your store better.
Order Fulfillment
Order fulfillment is the process of receiving, processing, and delivering orders to customers. Keep your inventory updated to avoid overselling. Use Shopify’s built-in inventory management tools for this. When an order comes in, pack the items carefully. Make sure they match the customer’s order. Use reliable shipping services to deliver orders on time. Provide tracking numbers so customers can follow their orders.
Consider automating parts of the fulfillment process. This can save time and reduce errors. Shopify offers apps that can help with automation. These apps can print shipping labels, update inventory, and notify customers. Automating these tasks can improve efficiency and customer satisfaction.
Customer Support
Providing excellent customer support is vital for your store. Respond to customer inquiries quickly. Use Shopify’s built-in chat feature to help customers in real-time. This can lead to more sales and happy customers. Offer multiple support channels. These can include email, phone, and social media. Make sure your contact information is easy to find on your website.
Keep your responses clear and polite. Address customer concerns and provide solutions. If a customer has an issue with an order, handle it promptly. Offering refunds or exchanges can turn a negative experience into a positive one. Happy customers are more likely to return and recommend your store to others.

Credit: skybootstrap.com
Frequently Asked Questions
What Is Shopify?
Shopify is an e-commerce platform that allows you to create an online store. It provides various tools to manage products, payments, and shipping.
How Much Does Shopify Cost?
Shopify offers various pricing plans starting at $29 per month. Higher-tier plans provide additional features and benefits.
Can I Customize My Shopify Store?
Yes, Shopify offers numerous themes and customization options. You can tailor your store’s appearance and functionality to fit your brand.
How Do I Add Products To Shopify?
To add products, navigate to the “Products” section in your Shopify dashboard. Click “Add product” and fill in the necessary details.
Conclusion
Starting a Shopify store can be a rewarding experience. Follow these steps carefully. Choose your products wisely. Design your store with a user-friendly layout. Set up payment methods and shipping options. Promote your store through social media and SEO strategies.
Keep learning and improving your store. Stay patient and consistent. Success takes time and effort. Your Shopify journey starts now. Happy selling!